Position: How Tos - Data Recovery - A Detailed Guide to Recover Lost Data with DiskGenius
DiskGenius - Recover lost files, manage disk partitions, and back up data for PCs and Servers.
ô Free DownloadDiskGenius is effective software for data recovery and disk management, and it is preferred and recommended by thousands of specialists. This guide presents how to deal with all types of data loss issues with the help of DiskGenius. To learn more about the features of the application, please visit: www.diskgenius.com. The length of this article is a bit long, and you can click the following titles to read the content you are interested in most.
The likelihood of successful data recovery depends on a series of factors, and this section explains how to maximize the recovery results.
First and foremost, keep calm and do not try any unproven methods to avoid worsening the problem. You should make sure no new data is saved to the drive prior to recovery in order to protect lost files from being overwritten. If lost files get overwritten, they can never be recovered, and no software can recover them. Also, do not perform any operation or changes to the drive where lost files are located. If the system partition is undergoing data loss, you should shut down the computer and recover data on a different machine or Pre-OS environment.
The other precondition is that the storage device (e.g. hard drive, external HDD, USB flash drive, SD card, etc.) that holds lost files should be recognized by the computer and DiskGenius. For instance, storage devices attached to the computer are displayed by DiskGenius as follows:

This screenshot shows all the storage devices on my computer, one is a local hard drive and the other is a USB flash drive. HD0 is a 2TB hard drive which is divided into 4 partitions, and Windows is installed on Local Disk (C:); RD1 is the USB disk and it consists of two partitions.
If a storage device which is connected to the computer via either a USB port or the motherboard cannot be recognized by DiskGenius, then it won't be displayed on the left pane. In this situation, we can conclude the device is physically damaged. Lost data on this device cannot be restored by any recovery software, and it should be sent to a professional data recovery company to retrieve data.
Note:
If a lost partition does not show up in File Explorer, that does not mean the hard drive cannot be detected. In general, data recovery won't be affected.
At times, a partition disappears from File Explorer due to a corrupt file system, which is not a physical issue either. Files and folders in this drive can also be recovered by DiskGenius.
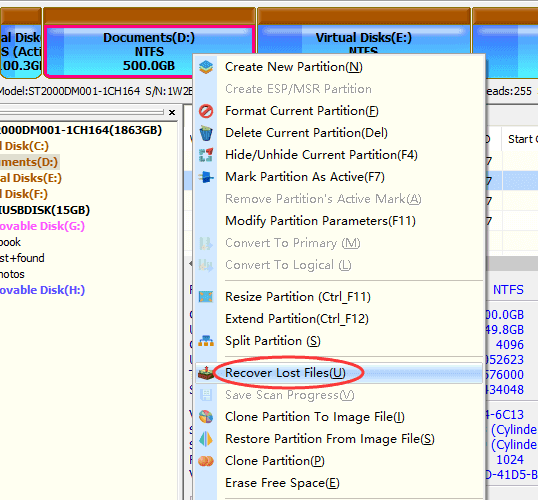
Many beginners believe that a data recovery program designed with an intuitive wizard such as CuteRecovery, is a better choice, while DiskGenius works more efficiently for data recovery. DiskGenius has a simple interface which shows all detected disks and partitions. You can clearly view detailed partition or disk parameters, such as file system, cluster, volume ID, $MFT cluster, cylinder, S.M.A.R.T. information, etc. Therefore, you can easily locate the partition where lost files were stored. Select the partition, right-click it, and choose "Recover Lost Files" from the context menu, as below:
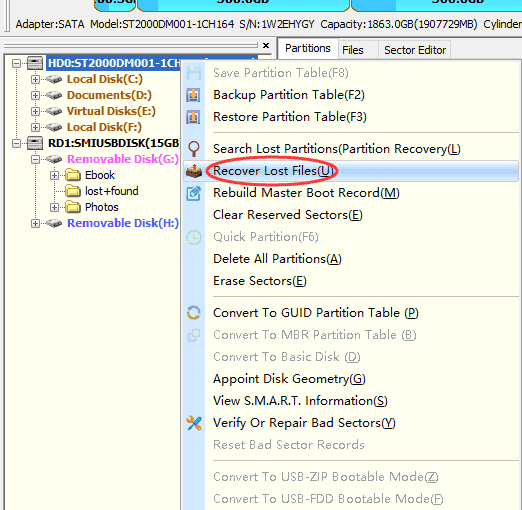
Sometimes you cannot decide which partition should be scanned for lost data; for example, if the old partition is lost or the hard drive has been repartitioned. If so, you may need to scan the entire disk for lost data: select the disk in the Partition and Folder Tree on the left pane, right-click it, and select "Recover Lost Files" as shown below:
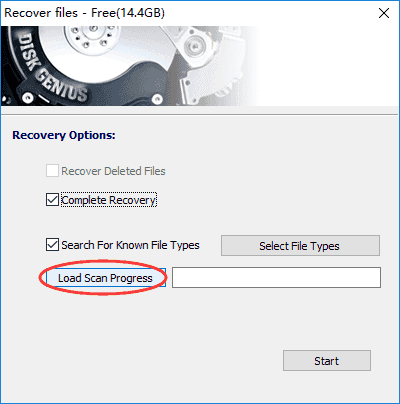
Following the previous step, the "Recover Files" window appears after selecting a location and choosing the "Recover Lost Files" option:
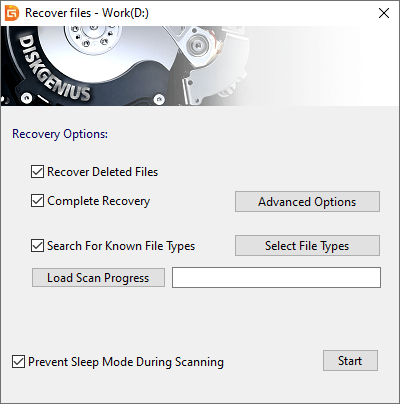
There are three options in this window, i.e., Recover Deleted Files, Complete Recovery, and Search For Known File Types. The "Load Scan Progress" feature will be discussed later in this article. These options represent three scanning methods that deal with different data loss issues.
Recover Deleted Files
This recovery mode applies to deleted file recovery only, and it scans the disk quite rapidly. If you've written data to disk after deletion, you may need to perform a complete scan for better recovery results.
Such recovery method scans directory information located in the partition file system, which takes around ten seconds to finish scanning a 100GB hard drive. Because of this, it works best for simple data recovery cases.
Complete Recovery
The scanning speed is relatively slow compared to deleted file recovery, yet it applies to most data loss issues and achieves satisfactory recovery results.
Complete recovery scans directory information in the file system as well as the corresponding data areas so that it is able to find as much valuable data as possible. Thus, a good scan result can be guaranteed, and the chance of successful recovery is high as long as the lost data is not overwritten. However, it takes much more time to complete scanning than recovering deleted data. To improve user experience and save time, DiskGenius displays lost files during scanning and keeps adding data continuously as it is found.
Search For Known File Types
This option searches for lost data at a slower speed, but it is able to achieve fairly good results when the partition is badly damaged or lost data is partly overwritten.
This recovery mode, called "universal recovery" by some recovery software, scans the partition or disk from beginning to end sector by sector. It recognizes data headers and identifies lost data by file type. It works well on storage devices which store data on continuous disk space, for example hard drives, memory cards, USB flash drives, etc. The shortcoming of recovering files by type is that recovered data does not have original names and directory structures.
Check the option "Search For Known File Types" and click the button "Select File Types", and you can select the file types you need from the pop-up window "Select File Types to Recover", as follows:
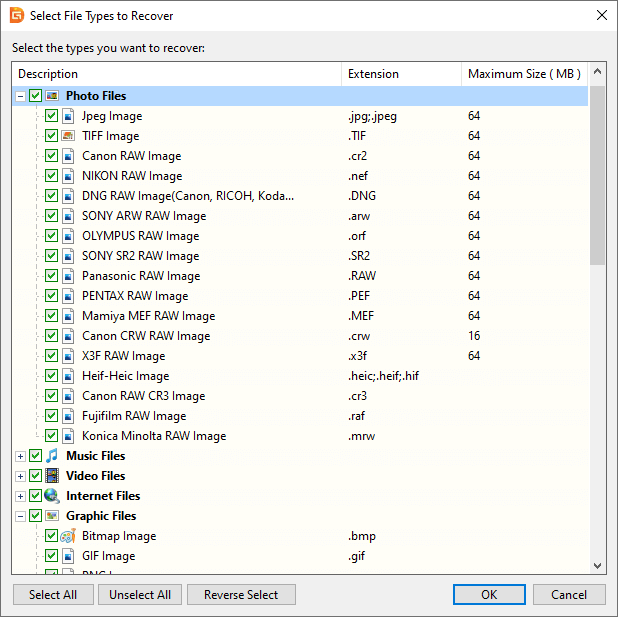
There are hundreds of file types available for selection, and almost all file types you may use are listed here. The default setting selects all file types, but you can just choose what you need to improve scan speed.
Tips for choosing recovery options
These three options are checked by default (in some case, DiskGenius disables "Recover Deleted Files", and it is greyed out and cannot be selected. That's because it is no use to do such scanning in that data loss case). In most situations, default setting is the best choice and it is recommended to follow it.
You may wonder how DiskGenius works when all recovery options are selected, here is a simple explanation:
More features of the data recovery process
Set recovery options and click the "Start" button, and DiskGenius starts to search for lost files. The following window appears:
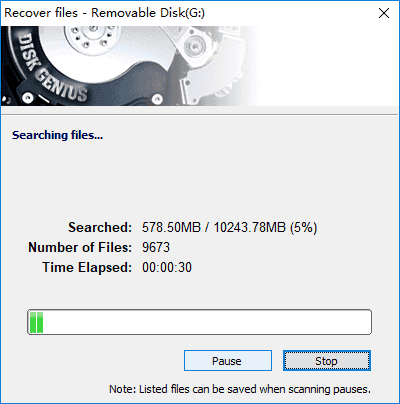
On the recovery window you can read the scanning progress which shows scanned disk space in number and percent; "Number of Files" shows how many files have been found, "Time Elapsed" indicates the time taken, and the progress bar shows the overall progress.
The bottom part of the window contains two buttons: Pause and Stop. You can control the scanning progress with these buttons. If all files you need have been displayed and previewed correctly, you can click either the Pause or Stop button and save desired data to a secure location.
The scanning result is displayed like File Explorer; the file directory tree is located on the left and the data preview is on the right side. Let's take a look at the partition and folder tree of recovered data:
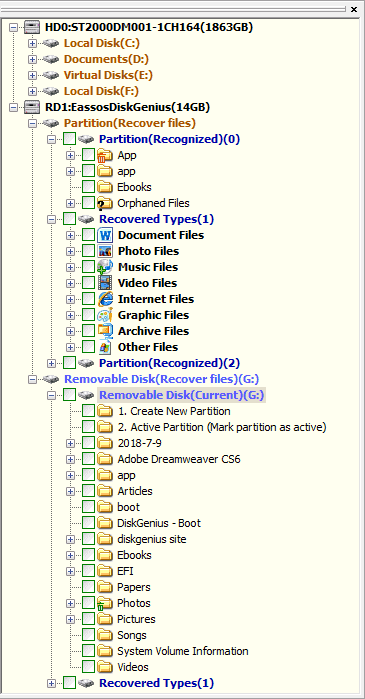
The drive whose name contains "Recover files" means it is recovering data. "Partition(Recognized)" is one of the lost partitions on the disk and there might be several such partitions. Files and folders under these partitions have names and retain the original directory. "Recovered Types" is the result of deep scanning and files here are organized by file type and named by number. If you select any directory here, you can see its files on the right pane.
Note:
Sometimes you can see a folder named "Orphaned Files" followed by a question mark, and files and folders listed under this part have lost their parent directory. However, there is a good chance that your files are listed here, especially when lost data gets damaged.
If you checked "Search For Known File Types" before scanning, you can see the "Recovered Types" section. Data in this part is classified by file type, such as Document Files, Photo Files, Music Files, etc. Click one file type and you can see folders named with file extensions, and click a folder and you can see all files are named by continuous numbers.
Choose one path on the left pane and its corresponding content will be shown on the right part as follows:
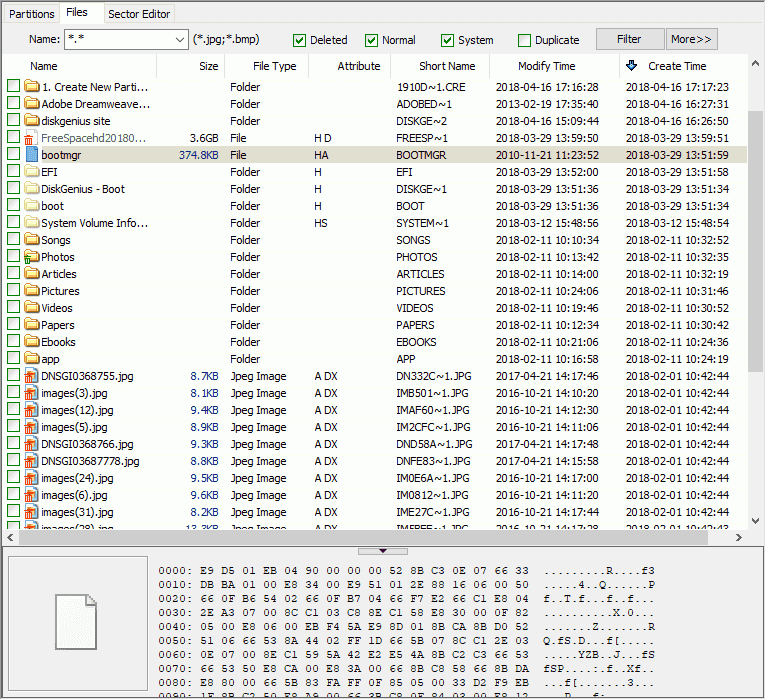
DiskGenius provides a file filter feature which helps users find out desired data among scan results quickly and easily. Here is how to filter files:
1. Use wildcard characters to filter files with certain names or file extensions, as shown below:

2. Choose whether to show deleted, normal, system or duplicate files. Check options as needed and click the Filter button.

3. Filter files by size and time.
Click "More" and you can see more filter options, as follows. You can set a range for file size, modify time, access time and access time so that the searching scope can be narrowed down.

If DiskGenius lists your files during or after scanning, you may wonder how to check whether they can be recovered correctly? At this time, the file preview function really comes in handy. File preview helps check file content so that you can determine if it is damaged.
In addition, files recovered by type do not have original names, but they can be viewed via file preview, and then you can decide whether to recover them.
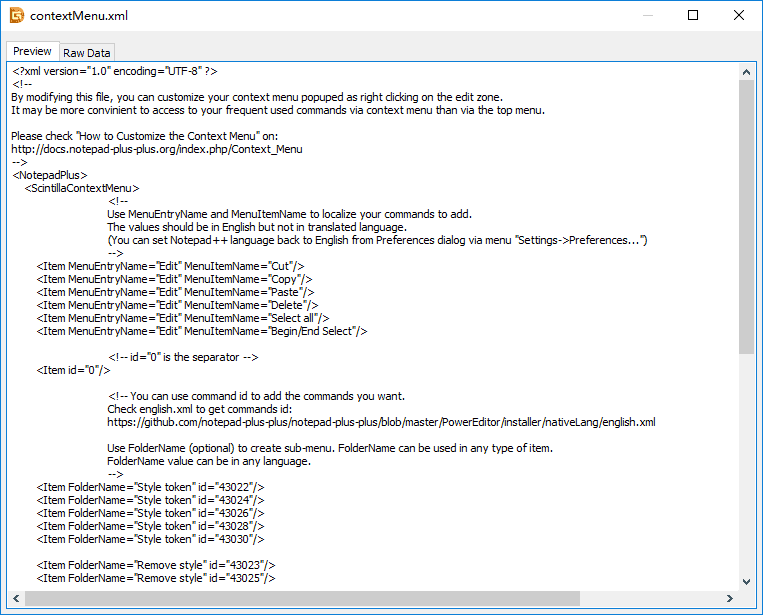
DiskGenius provides an effective file preview feature which is able to preview text, photos, MS Office files, PDF, audio and video files. Other file types such as applications can be previewed in hex data. There are three methods to preview a file: double-click it on the right pane, double-click the thumb preview, or right-click it and select the Preview option from the context menu.
The file preview window shows file content and you can check if it is correct or corrupted. The following screenshots show results of previewing various types of files:
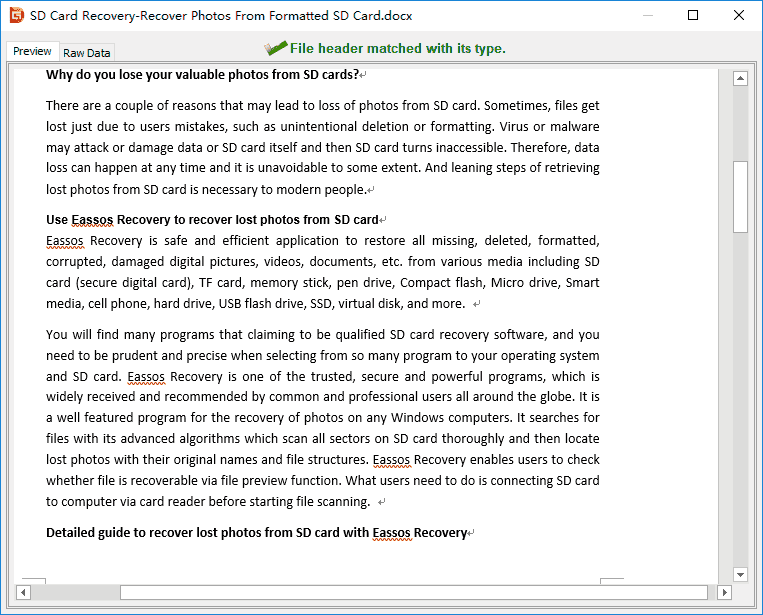
Preview text file:
Preview picture:

Preview MS Office file:
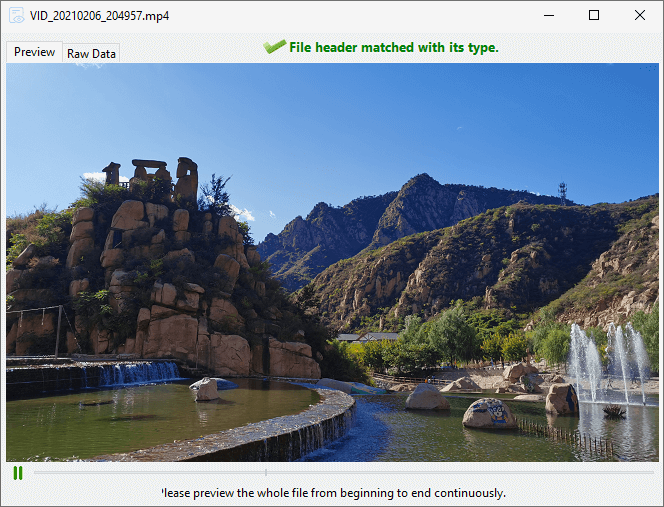
Preview mp4 file:
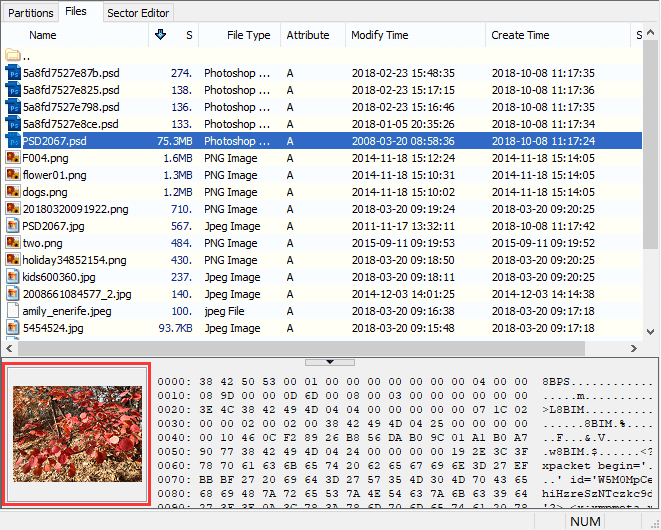
You might have noticed that a thumbnail preview is available in the lower pane of the software when you click a file, which makes file preview more flexible.
The file preview feature is effective and convenient and it is designed to help users quickly find out desired files and decide whether these files can be recovered successfully. It is one of the most necessary and important features a data recovery application should provide.
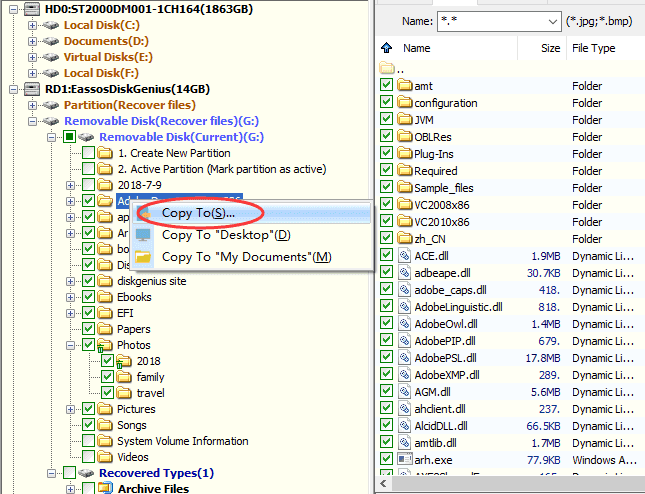
Copy files You need to copy files from the scanning result to a different drive to get files recovered, and you can save data when the scanning progress pauses or stops. Select files and folders you want to recover in either the left or right pane and right-click the selected data to choose "Copy To", as follows:
You can copy files listed in the scanning result all at once or just copy some of them. File names and directory structure won't be changed after copying them to a different location, as the entire recovery process is read-only.
So far, the DiskGenius Free Edition works the same as registered editions such as the Standard Edition. However, if you want to continue the recovery process you'll see the window that prompts you to register, as below:
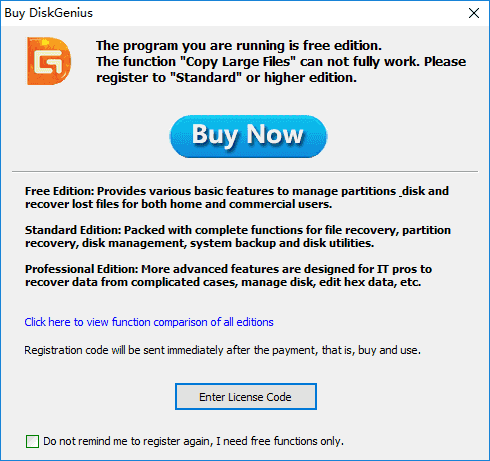
The Free Edition allows you to copy files whose size is smaller than 64KB, thus in general, you may need to buy a license code to recover larger files.
DiskGenius currently provides two editions: Free and Professional. The DiskGenius Free edition includes basic features to manage partitions, data backup and file recovery, for example, resizing partitions, hiding partitions, cloning disks, migrate Windows, etc. The Free edition allows you to search for lost data and preview files, but it has limitations on recovering files (e.g., it cannot copy large files).
If you need to recover files of any size, or if you work on data recovery or are skilled in computer technology, you should consider the Professional Edition for the reasons below:
The DiskGenius Professional Edition is much more powerful and it is able to deal with complicated data loss issues, for instance recovering data from RAID, virtual disks, defining hard disk geometry, etc.
DiskGenius Professional Edition is not only a data recovery program but also an all-inclusive disk partition management software, offering advanced features such as full access to EXT4/3/2 partitions, managing disks and partitions for virtual machines, editing hex data, etc. Once you purchase the Professional Edition, the license code will be sent to your email within minutes so that you can register DiskGenius at once.
This section explains a couple of issues you may encounter when recovering lost data or partitions.
There are some symptoms that indicate hard drive bad sectors: data recovery scanning is very slow or even sticks at a certain point; DiskGenius stops at the startup interface; the computer slows down or freezes once the hard drive is connected; the hard drive stops working suddenly; the hard drive partition gets lost for no reason, etc. If DiskGenius takes too long or sticks somewhere for a very long time, you can stop scanning in advance and back up data as much as possible. Alternatively, you can seek help from a professional data recovery company.
Note: DiskGenius provides the feature to check and repair bad sectors. However, you should back up or recover data first, as repairing bad sectors destroys data.
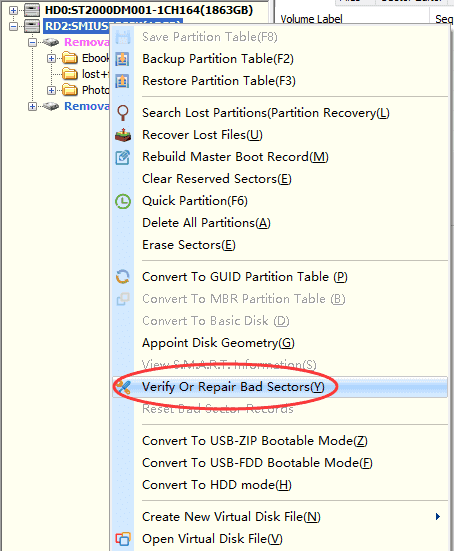
How to check hard drive bad sectors with DiskGenius? Right-click on the damaged disk and select "Verify Or Repair Bad Sectors/Blocks" from the context menu.
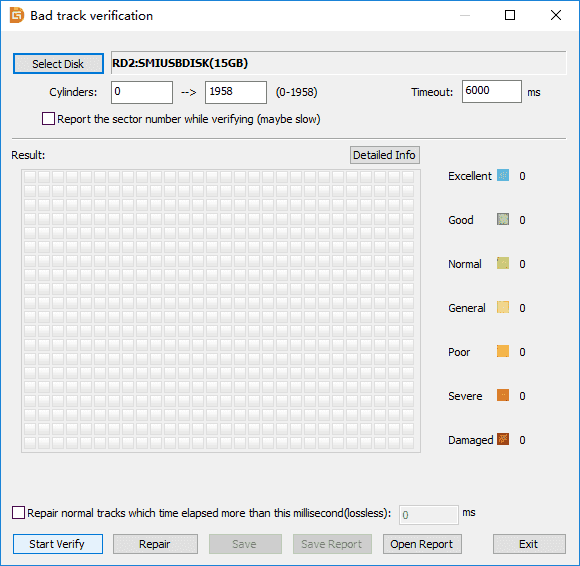
The bad sector verification window pops up and you can click "Verify" button to scan bad sectors on the drive. Once any bad sectors are found you can try repairing them with this program. Keep in mind that you should not try repairing bad sectors before files are recovered.
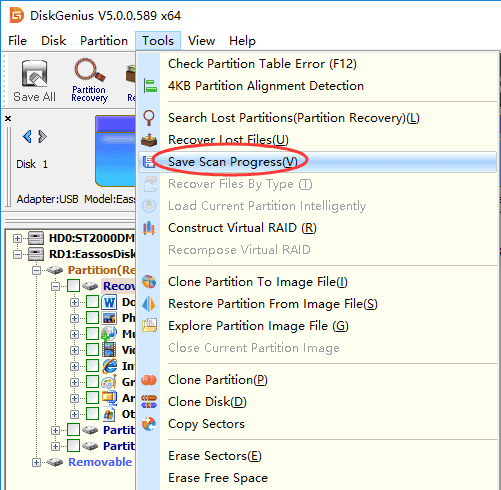
You may wonder what if you need to restart the program or computer when scanning an entire hard drive or partition takes a very long time. At this point, recovery progress should be saved so that you can resume recovery later. DiskGenius saves scanning progress automatically to the folder where it is installed and the file is saved with extension ".dgrp". Besides, you can save scanning progress on your own: Click the "Tools" menu and choose the "Save Scan Progress" option.
How to import scanning progress and resume recovery? If you choose to scan the same drive once again, DiskGenius prompts to whether to load previous scanning progress automatically after you click the Start button. In addition, you can click the "Load Scan Progress" button to load scan progress file manually. This feature helps resume previous recovery, saving time and effort.
DiskGenius supports partition recovery which helps to recover lost or deleted partitions and files.
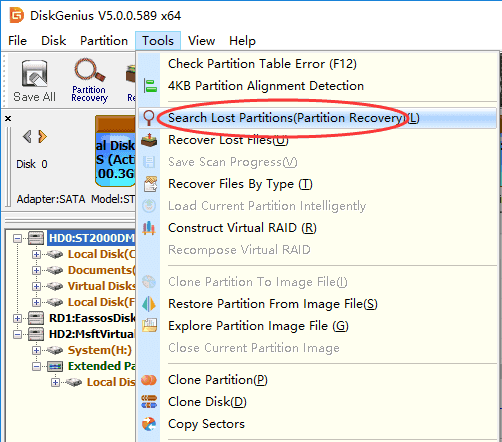
Select the disk which needs recovering partitions, click Tools menu and choose "Search Lost Partitions (Partition Recovery)". Then the partition recovery window pops up.
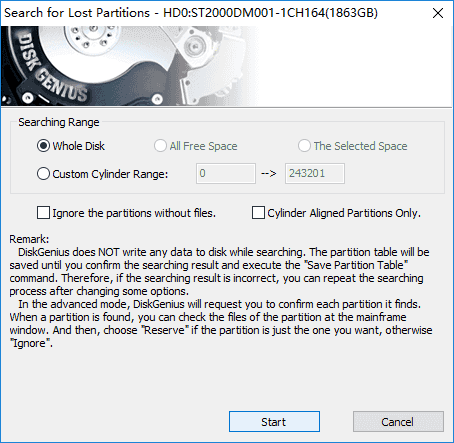
Select the searching range and click the "Start" button, and DiskGenius starts to scan the disk for lost partitions
In some cases, partition recovery is capable of restoring lost partitions and their files on the original disk without copying data to a different disk. You can save the lost partition to the current partition table directly. However, such operation requires that users are familiar with disk partition conditions before they were lost. For more information about partition recovery, please refer to the DiskGenius online manual.
DiskGenius contains a sector editor which can be found by clicking tab "Sector Editor" as follows:
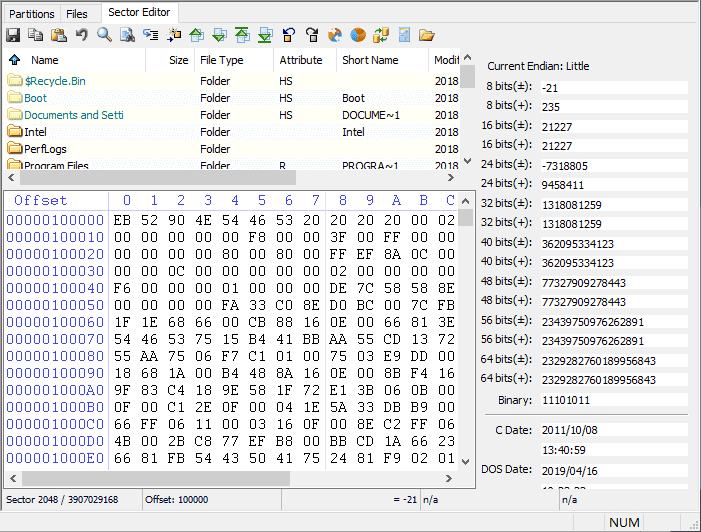
This hex data editor works similarly to WinHex and it provides great utility for data recovery. With this feature you can recover data manually and deal with more complicated data loss issues.
With DiskGenius you can also recover lost data from RAID, as it enables you to construct a virtual RAID if you can correctly calculate RAID parameters. Click Tools and select Construct Virtual RAID, as below:
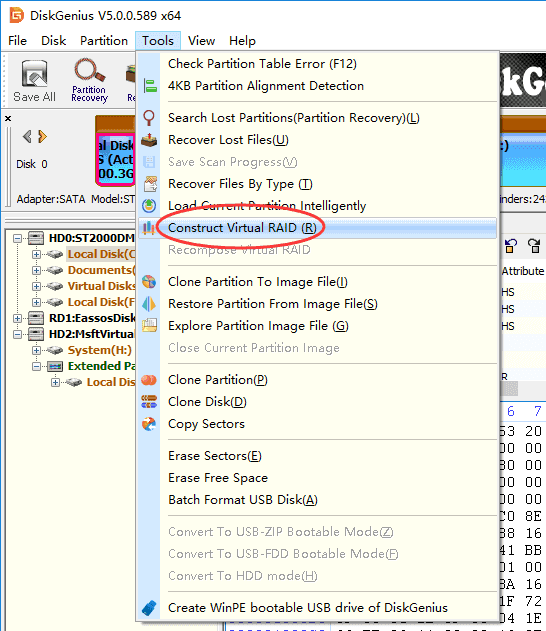
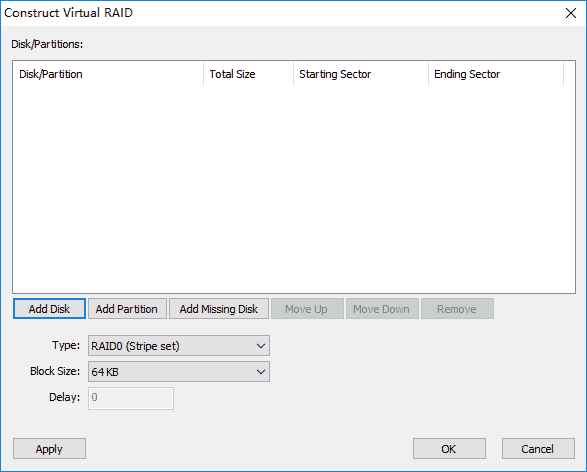
Now you can add disks or partitions to create virtual RAID. This feature is designed for advanced users who are specialized in RAID data recovery. If you are not experienced in RAID data recovery, you can seek help from DiskGenius experts.
Virtual disk data recovery A Virtual machine enables users to run a different operating system and it is widely used among software developers and users who want to use an OS other than the one they own. Therefore, it is very possible that virtual disks contain important files for you. Do you know how to recover lost data once a virtual disk suffers data loss? DiskGenius comes in handy!
DiskGenius can be installed and launched in a Virtual Machine which runs Windows systems and you can search for lost files or partitions likewise on a physical machine. In addition to this, you can try a much easier way to perform virtual disk data recovery. Run DiskGenius from the physical computer and load the virtual disk without launching your virtual machine, after which you can perform data recovery.
Click Disk and choose Open Virtual Disk File, as follows:
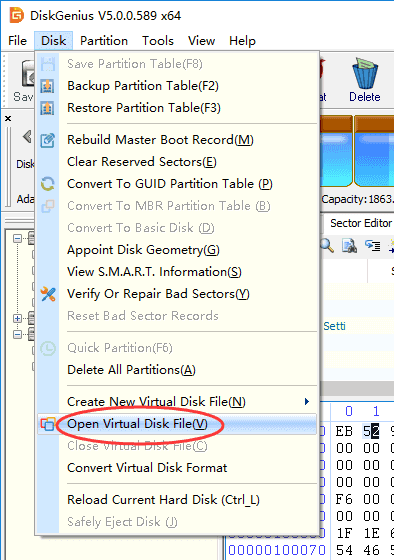
Then you can manage the virtual disk just like a general hard drive. In this way, data recovery can be easier and safer.
Download DiskGenius now and try data recovery now!
DiskGenius - A free partition manager and disk cloning tool for Windows PCs and Servers.
ô Free Download Facebook
 YouTube
 X
X