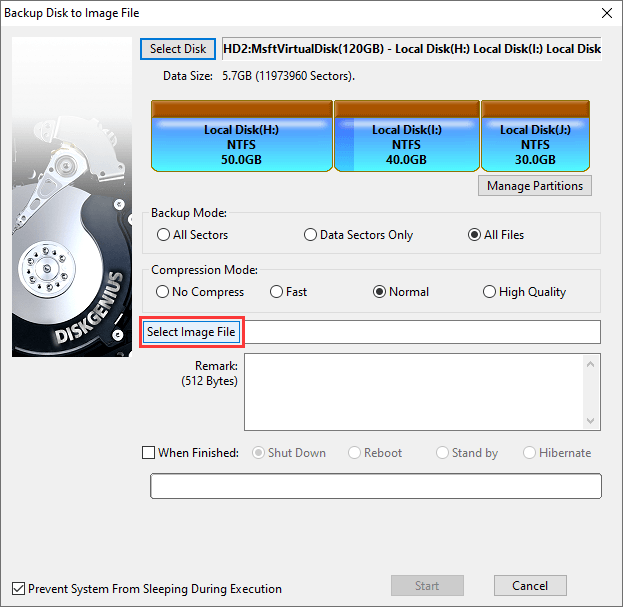
This function creates a backup for an entire disk by creating a compressed file for the disk, and all partitions and files on the disk will be contained within the compressed file which is saved as an image file with .pmfx extension. DiskGenius supports three modes to image a disk.
All Sectors: Back up all sectors of the source disk to the image file in sequence from beginning to end, without checking whether these sectors contain valid data. This disk imaging method will copy a large amount of invalid data and take longer time, and yet it is the most complete method. When restoring the image, the target disk should not be smaller than the source disk.
Data Sectors Only: Valid data is backed up to the image file "as it" according to the file system layout of each partition on the source disk. The disk imaging process only backs up sectors containing valid data and it is the fastest way. When restoring the image, the target disk should not be smaller than the source disk.
All Files: Backup all files and other valid data of the source disk one by one into the image file. This method does not backup sectors that contain invalid data, so it is quite fast. The disk image can be restored to a smaller disk which is large enough to receive the data to be restored. The storage location of restored files will be rearranged, and the newly restored disk will be free of file fragmentation.
The disk image can be created with various compression levels, from Fast, Normal to High Quality. Data compression option affects disk imaging speed and the size of the image file. The higher compression quality you choose, the slower the disk imaging speed will be, but the smaller the image file will be.
When imaging system disk, you can choose hot backup mode which can complete the task without restarting computer or rebooting to WinPE.
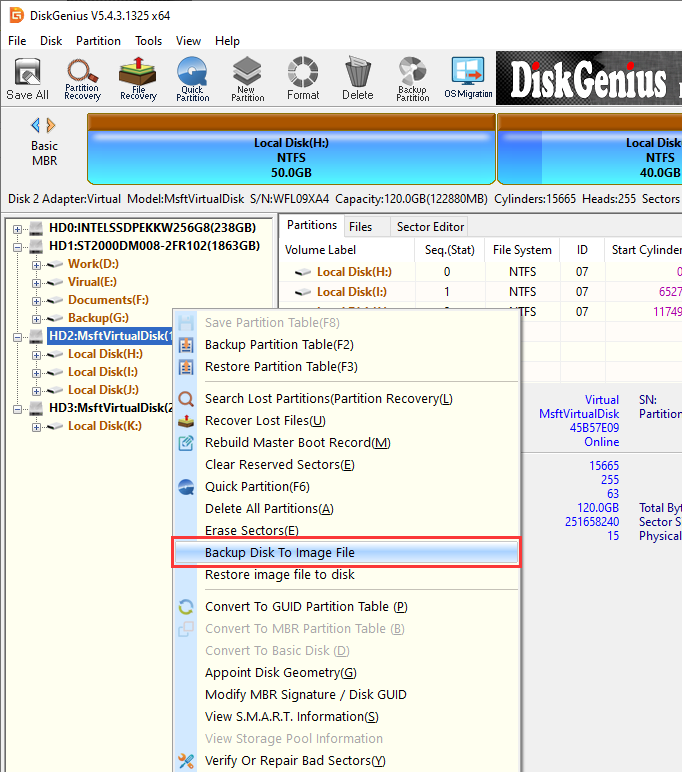
Step 1. Right-click the disk you want to backup and choose "Backup Disk To Image File" from context menu.
Step 2. Click "Select Image File" button when the follow window pops up.
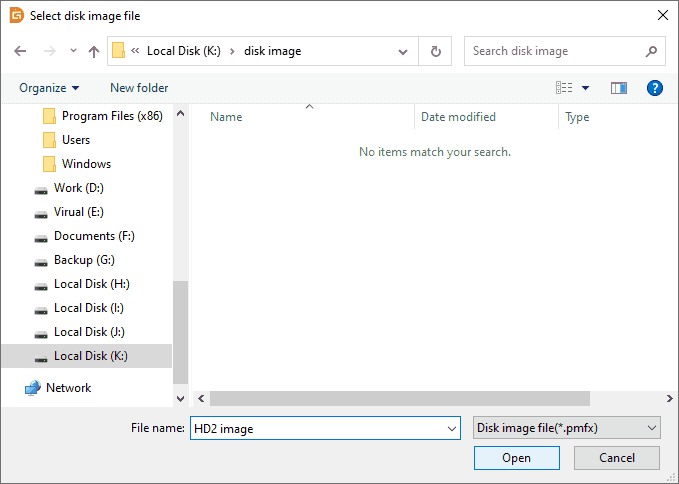
Step 3. Select a location on another disk to save the disk image file. Set a name for the image file and click "Open" button.
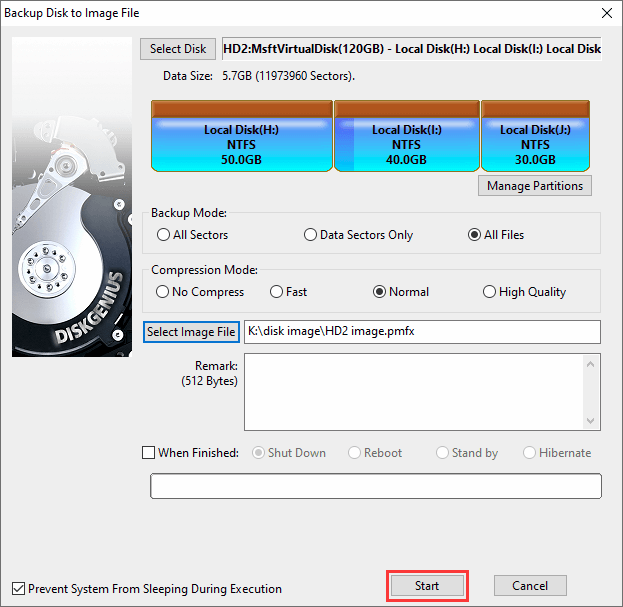
Step 4. Click "Start" button.
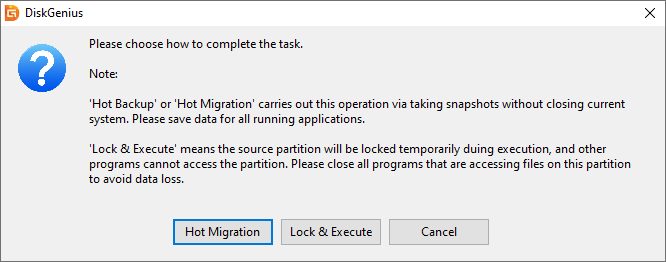
Step 5. Select the way to image the disk.
"Hot Migration" or "Hot Backup" will image the disk without stopping or restarting Windows OS. "Lock & Execute" means the source disk will be locked temporarily during the disk imaging, and other programs cannot access the disk.
Step 6. Wait for the disk imaging to complete.


 Facebook
 YouTube
 X
X