DiskGenius provides the System Migration feature that lets you transfer your Windows operating system — along with all installed applications and data — to another storage device without reinstalling anything. Whether you're migrating to an HDD, SSD, USB drive, or even multiple target disks at the same time, the process is simple and efficient.
The target disk can be smaller than the source disk as long as it has enough space to hold the data being migrated. During the entire process, DiskGenius ensures that your existing system environment, applications, and personal files are retained exactly as they are.
Before starting the migration: Connect the target disk(s) (e.g., HDD, SSD, or USB drive) to your computer. If you plan to migrate the operating system to multiple disks simultaneously, make sure all target devices are properly connected and recognized by DiskGenius.
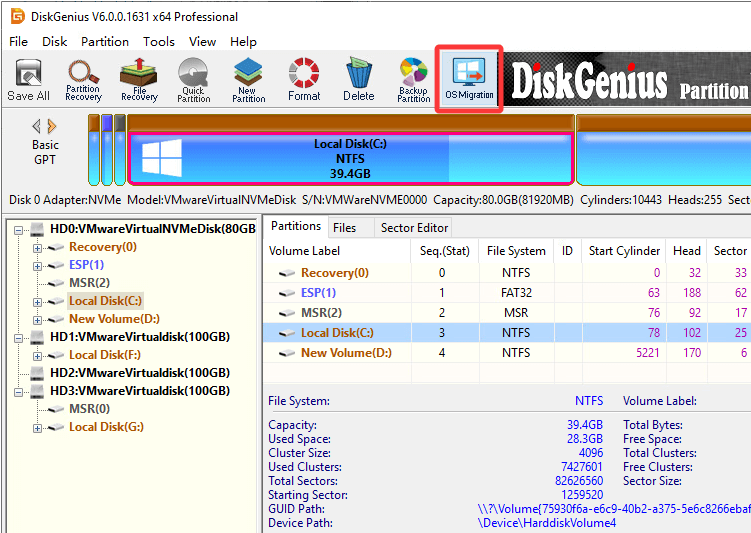
Step 1. Start the System Migration feature.
Launch DiskGenius, click the OS Migration button on the toolbar, or go to Tools > System Migration from the menu.
Step 2. Select target disk(s).
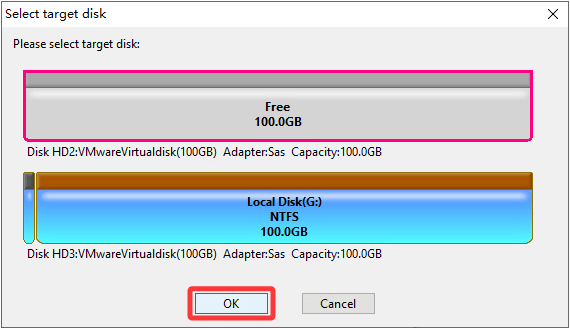
In the pop-up window, choose the disk you want to migrate the system to and click OK.
Note: The target disk's capacity can be smaller than the source disk, but it must be large enough to hold the used space of the system partition.
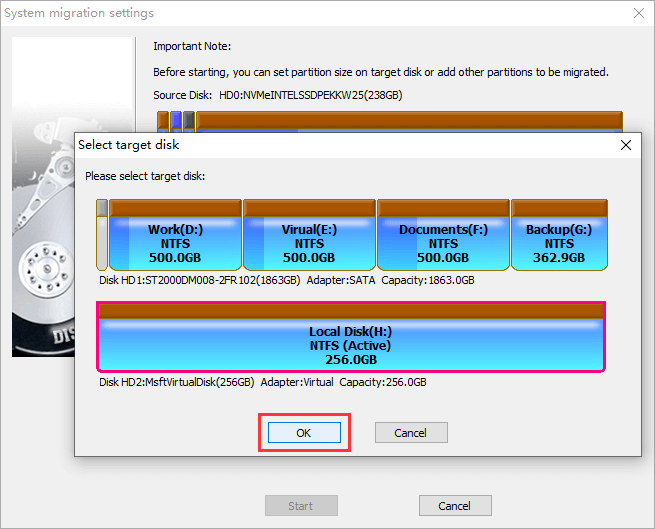
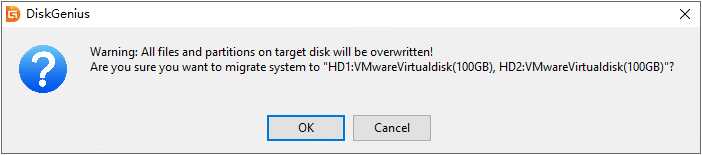
If the selected target disk contains partitions or data, a warning message will appear. Confirm the message and click OK to proceed.
To add multiple target disks, click Add Target Disk.
In the Select Multiple Target Disks dialog box, click Add Disk.
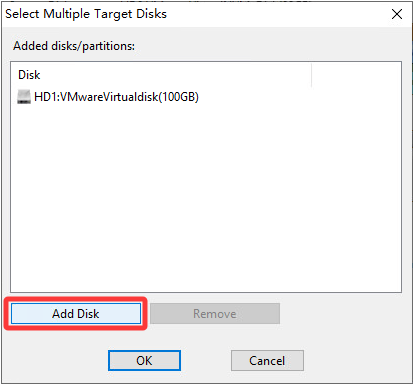
Choose the disk you want to add, and then click OK after selection.
After all target disks are added, click the OK button.

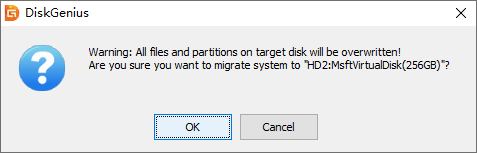
The program will pop up the following warning, prompting that all data on the target disk will be overwritten. Confirm by clicking OK.
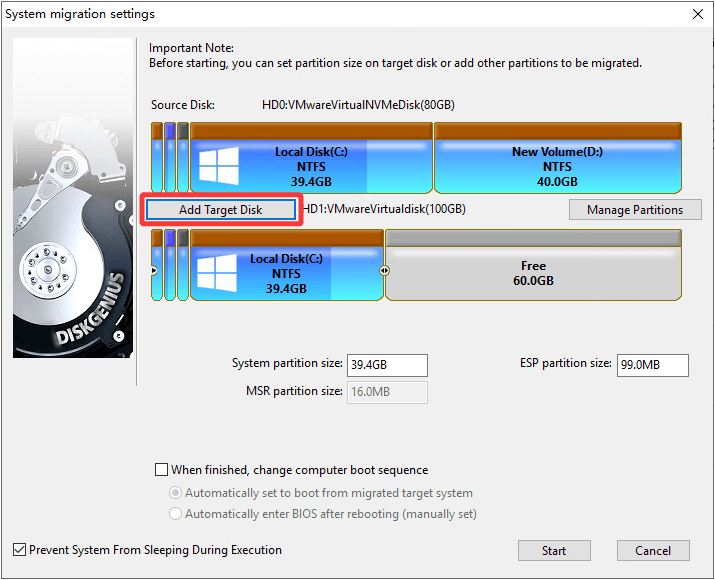
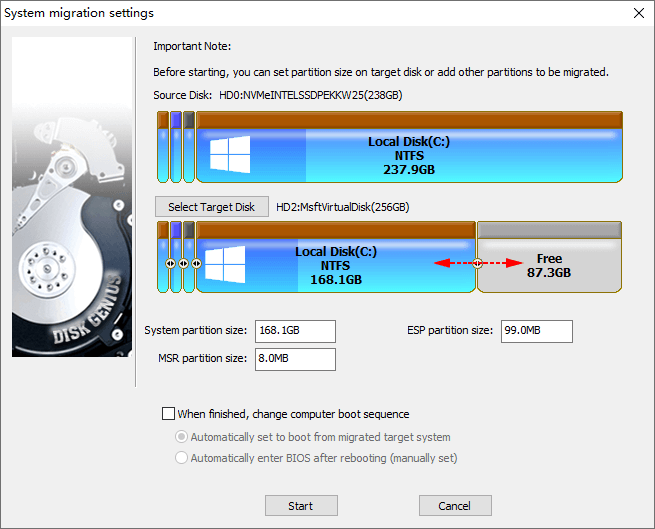
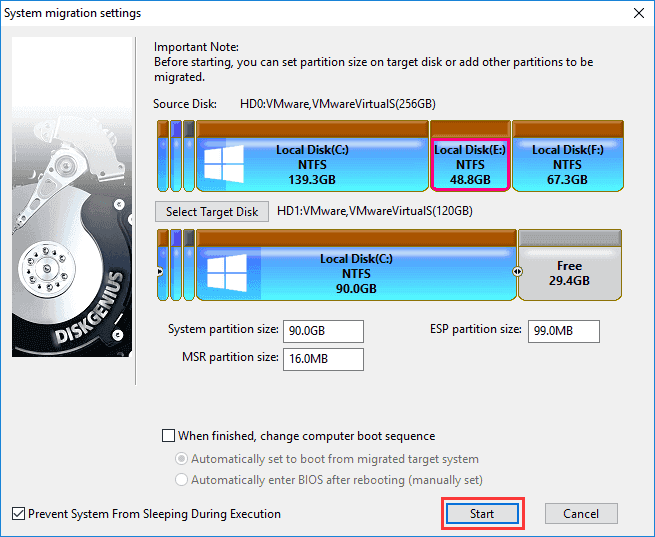
Step 3. Adjust partition layout on target disk(s).
After selecting the target disk(s), you can customize migrated partitions and their size on the target disk(s):
Choose which partitions to migrate: By default, DiskGenius migrates the system partition and boot partition. You can click Manage Partitions to choose whether to add other partitions for migration, or remove the partitions that do not need to be migrated.
Adjust partition size: You can adjust partition size by dragging the partition boundary on the target disk or manually entering the capacity value. For example, if the space of drive C on the original disk is small, you can extend the drive C on the target disk.
Step 4. Configure boot settings (UEFI Only).
For UEFI-based computers, DiskGenius provides options to configure the boot sequence after migration. After checking the "When finished, change computer boot sequence" option, you can choose one of the following:
Automatically set to boot from migrated target system: The computer will boot from the target disk after migration.
Automatically enter BIOS after rebooting (manually set): The computer will restart and enter BIOS so you can manually select the boot device.

Step 5. Confirm warnings.
Once everything is configured, click Start.
A prompt will appear to warn you that the migration will erase all data on the target disk(s). Make sure important data has been backed up, then click OK to proceed.
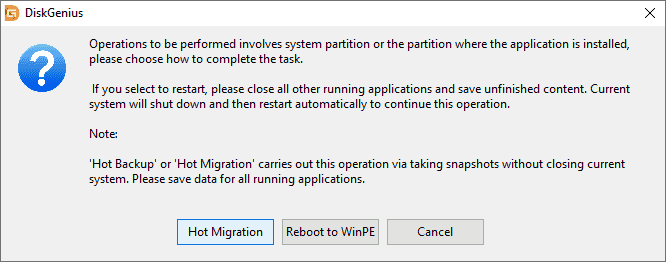
Step 6. Select a migration method.
DiskGenius provides two migration modes:
Hot Migration: Migrate the operating system without restarting the computer. You can use the computer normally during the migration process.
Reboot to WinPE: The computer will restart and automatically enter the WinPE environment, and DiskGenius will perform the migration in this environment.
In most cases, the "Hot Migration" mode is more convenient and safer, and it is recommended to use this mode first.
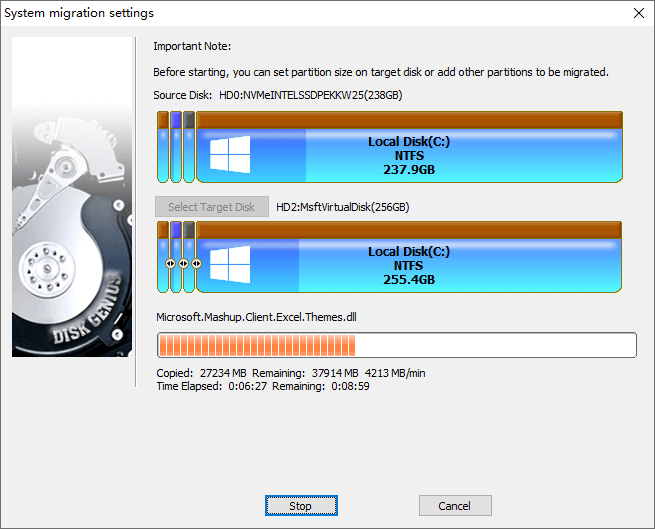
Step 7. Execute the system migration.
After clicking the migration method, DiskGenius starts the migration operation. Please wait patiently for the operation to complete.
The window displays information including the overall migration progress, the amount of data copied and remaining, elapsed time, and estimated time remaining.
Step 8. Complete migration and boot into the new system.
When the migration is complete, a confirmation message will appear:
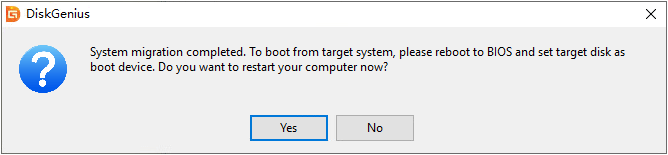
If the computer supports UEFI and you selected "Automatically set to boot from migrated target system" before migrating the system, the computer will automatically boot from the target disk after restarting; if automatic startup is not set, you need to manually enter the BIOS settings and set the target disk as the boot device.
After entering the system, you will find that the migrated Windows environment is exactly the same as the original system. All installed programs and data in the original system partition have been completely migrated. There is no need to reinstall the system or software, nor to manually copy data.


 Facebook
 YouTube
 X
X