This feature can share a local disk over a local area network (LAN) or wide area network (WAN), making it easy to access, transfer, or maintain data remotely. Depending on your network environment, DiskGenius offers two connection methods: LAN Connection and WAN Connection. Below are detailed instructions for each scenario:
You can use this method to share a disk when the Sharing Device (the device providing the disk) and the Accessing Device (the device accessing the shared disk) are not on the same local network (e.g., remote offices, home-to-office access).
Step 1. Operations on the Accessing Device (the device accessing the shared disk).
1. In DiskGenius, click the "Disk" menu and select "Load Shared Disks".
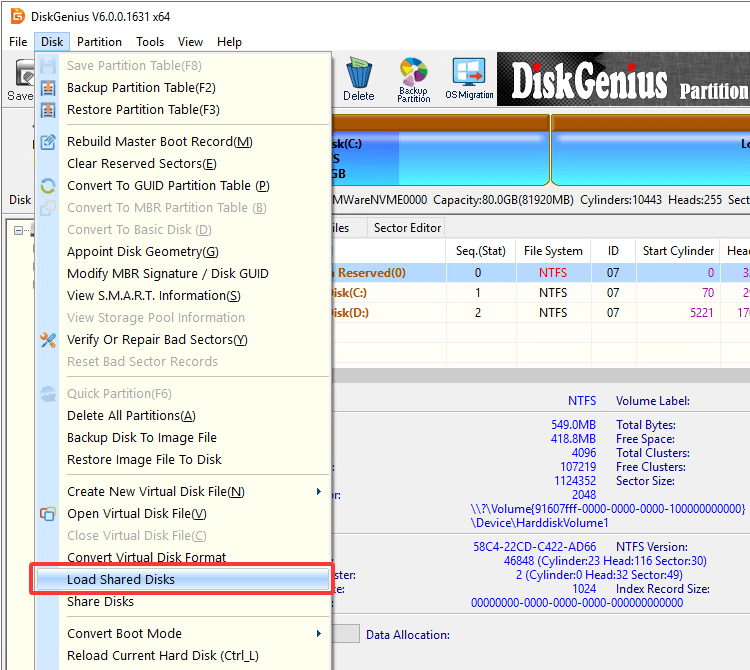
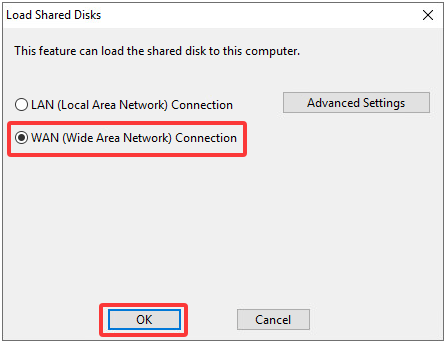
2. In the "Load Shared Disks" window, select "WAN (Wide Area Network) Connection", and click "OK".
Tip: If your network environment is complex, you can click the "Advanced Settings" button to configure additional options such as specifying a port number or choosing between IPv4 and IPv6 connections.
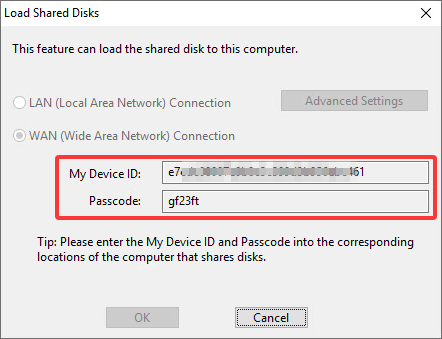
3. After clicking "OK", DiskGenius will display the "My Device ID" and "Passcode". These will be provided to the sharing device for identity verification.
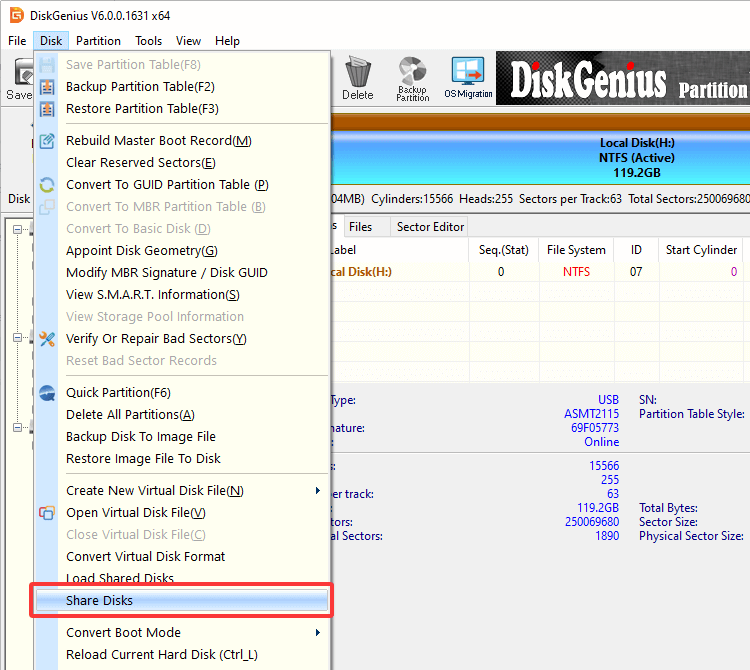
Step 2. Operations on the Sharing Device (the device providing the disk)
1. Select the disk you want to share, click the "Disk" menu, and select "Share Disks".
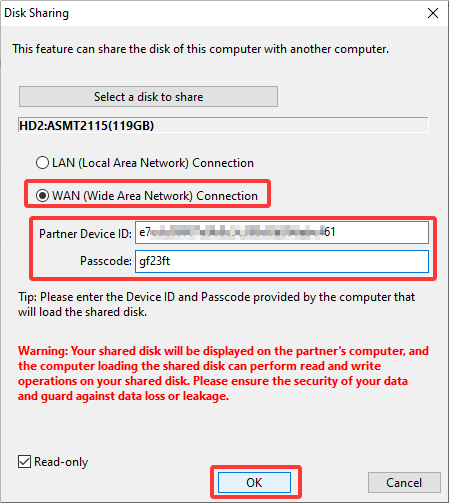
2. In the "Disk Sharing" dialog box, select "WAN (Wide Area Network) Connection". Enter the Partner Device ID (the "My Device ID" from the Accessing Device) and the corresponding Passcode. Click "OK".
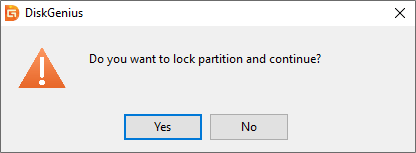
3. A prompt will appear: "Do you want to lock partition and continue?", click "Yes".
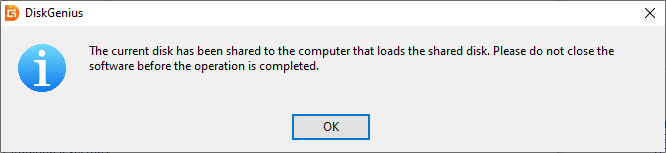
Another prompt will appear: "The current disk has been shared to the computer that loads the shared disk. Please do not close the software before the operation is completed." Click "OK".
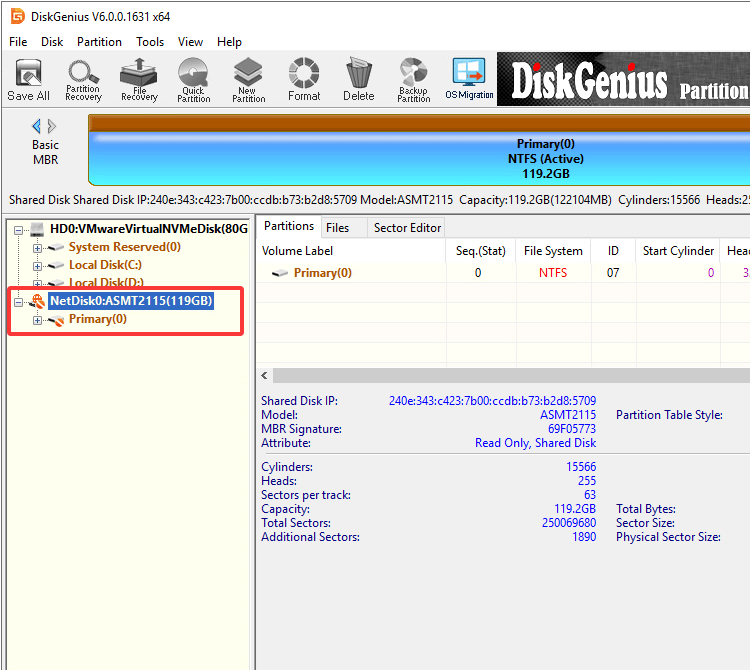
At this point, the disk is successfully shared, and the Accessing Device can view and access it directly through DiskGenius.
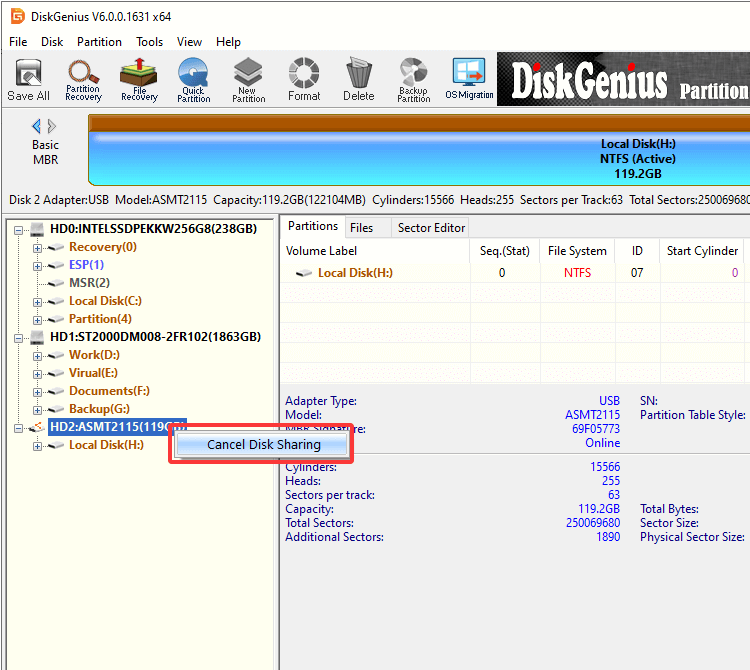
Stop sharing the disk
To stop sharing, right-click the shared disk on the Sharing Device and select "Cancel Disk Sharing".
When the Sharing Device (the device providing the disk) and the Accessing Device (the device accessing the shared disk) are on the same local network (such as connected to the same Wi-Fi or within the same company network), it is recommended to use the LAN connection method for faster and simpler setup.
Step 1. Operations on the Sharing Device.
1. Select the disk you want to share, click the "Disk" menu, and select "Share Disks".
2. In the "Disk Sharing" dialog box, select "LAN (Local Area Network) Connection", and click "OK".
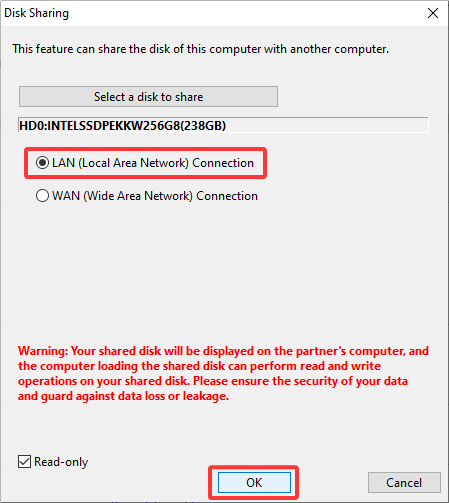
If a prompt appears saying "Do you want to lock partition and continue?", click "Yes".
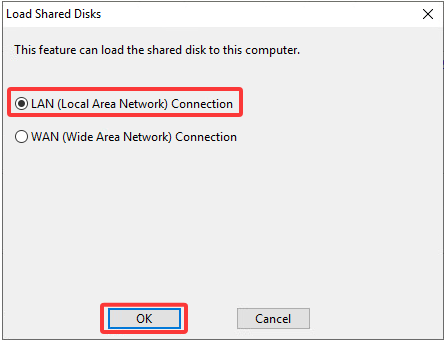
Step 2. Operations on the Accessing Device.
1. Click the "Disk" menu and select "Load Shared Disks".
2. In the "Load Shared Disks" dialog box, select "LAN (Local Area Network) Connection", and click "OK".
After clicking the "OK" button, the dialog changes as follows.
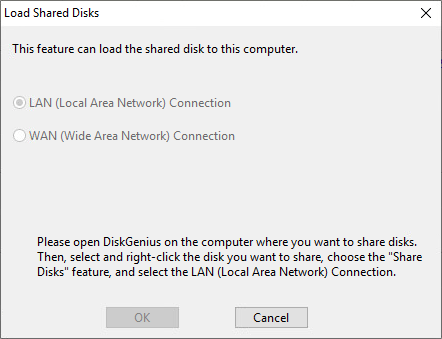
Step 3. Complete the disk sharing.
The Sharing Device will receive a prompt: "Received the broadcast from the side loading the shared disk. Are you sure to lock the disk and share the current disk to the computer that loads the disk?" . Click "Yes".
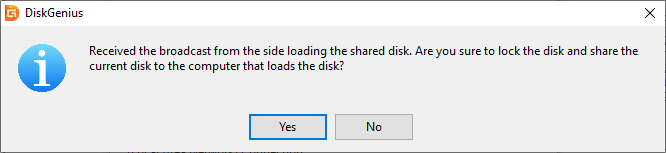
Then, another prompt will appear: "The current disk has been shared to the computer that loads the shared disk. Please do not close the software before the operation is completed." Click "OK".
At this point, the Accessing Device can view and access the shared disk.
Stop sharing the disk.
To stop sharing the disk, right-click the shared disk on the Sharing Device and select "Cancel Disk Sharing".

 Facebook
 YouTube
 X
X