
Updated on Jan. 06, 2026
Position: Resource - Disk Utilities - How to Check Your SSD for Errors Using Free SSD Test Tools
In today's digital age, solid-state drives (SSDs) have become the preferred computer storage device due to their superior performance and reliability. However, even high-quality SSDs may have errors. These errors may affect system performance, data integrity, and even cause data loss. Therefore, it is crucial to check SSD errors regularly. This article will detail how to check SSD errors and provide some practical tools and methods.
Before diving into the methods, it's important to understand why error checks matter for SSDs:
• Data Corruption: Logical errors (e.g., file system issues, bad sectors) can corrupt files, leading to crashes or lost data.
• Wear and Tear: SSDs have a limited number of write cycles. Over time, cells may degrade, causing read/write failures.
• Firmware Bugs: Outdated firmware can introduce glitches that affect stability.
• Early Warning: Catching errors early can prevent catastrophic failure and give you time to back up data.
Windows includes built-in tools to scan for and repair disk errors. These work for both SSDs and HDDs, but SSDs require extra care to avoid unnecessary wear.
This tool scans for file system errors and bad sectors. Here's how to use it:
1. Open File Explorer and right-click on your SSD (usually labeled "Local Disk (C:)" or another drive letter).
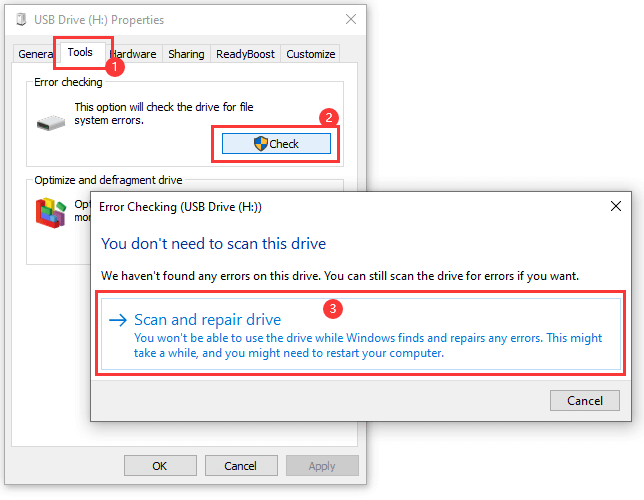
2. Select Properties > Tools > Check (under "Error checking").
3. If Windows says "You don't need to scan this drive," click Scan and repair drive to run the check anyway.
4. The tool will scan for errors. If issues are found, follow the prompts to repair them. Note that repairs may require a restart.
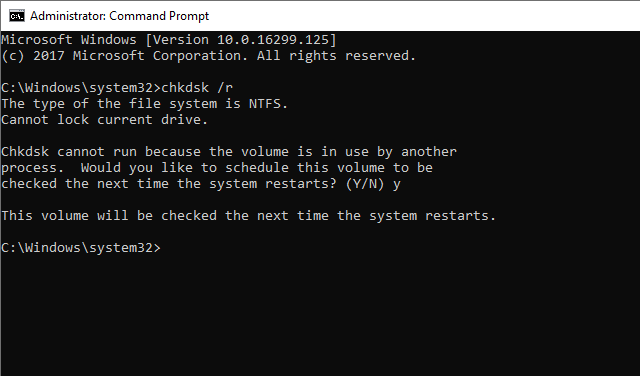
For more control, use the Command Prompt with the chkdsk command:
1. Press Win + X and select Command Prompt (Admin) or Windows PowerShell (Admin).
2. Type chkdsk [drive letter]: /f /r (e.g., chkdsk C: /f /r) and press Enter.
/f: Fixes errors on the disk.
/r: Locates bad sectors and recovers readable information.
3. If the drive is in use, Windows will ask to schedule the scan for the next restart. Type Y and restart your PC.
Note: Avoid running chkdsk too frequently on SSDs, as it can increase writing cycles. Use it only when you suspect issues.
DiskGenius is a free hard drive diagnostic software that can detect errors such as bad sectors on SSDs, modify hard drive parameters and display S.M.A.R.T. properties. You can regularly test your SSD to prevent unknown problems and protect your data from loss caused by disk damage.
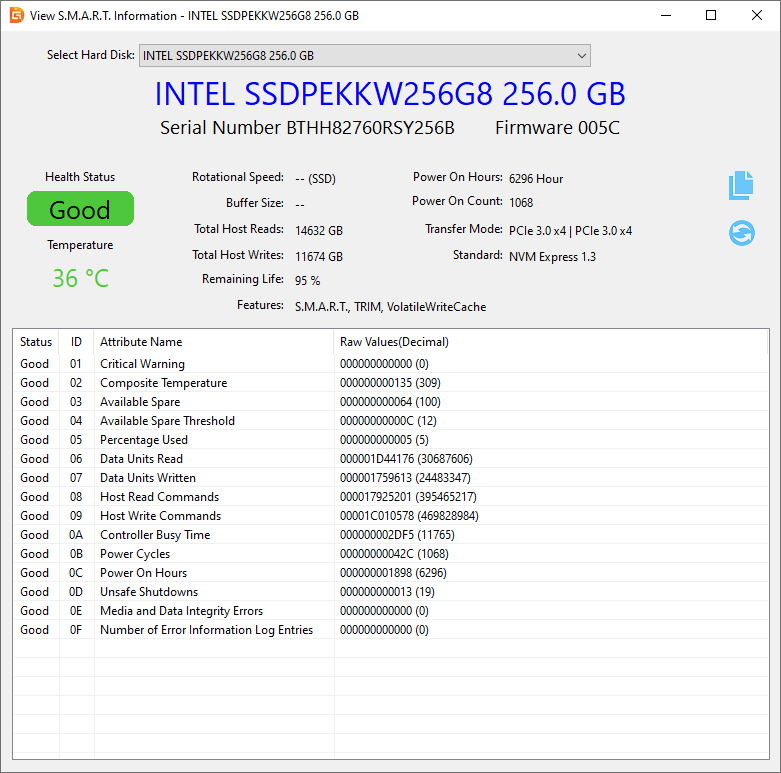
Step 1. Select the SSD in DiskGenius whose S.M.A.R.T. information you want to check, and then click the "View S.M.A.R.T. Information" option in the "Disk" menu.

Step 2. A window pops up and you can view detailed S.M.A.R.T. data such as Serial Number, Health Status, Temperature, Power-on Hours, etc.
Step 1. Select the SSD you want to check or repair bad sectors, then click the "Disk" menu to select "Verify Or Repair Bad Sectors".
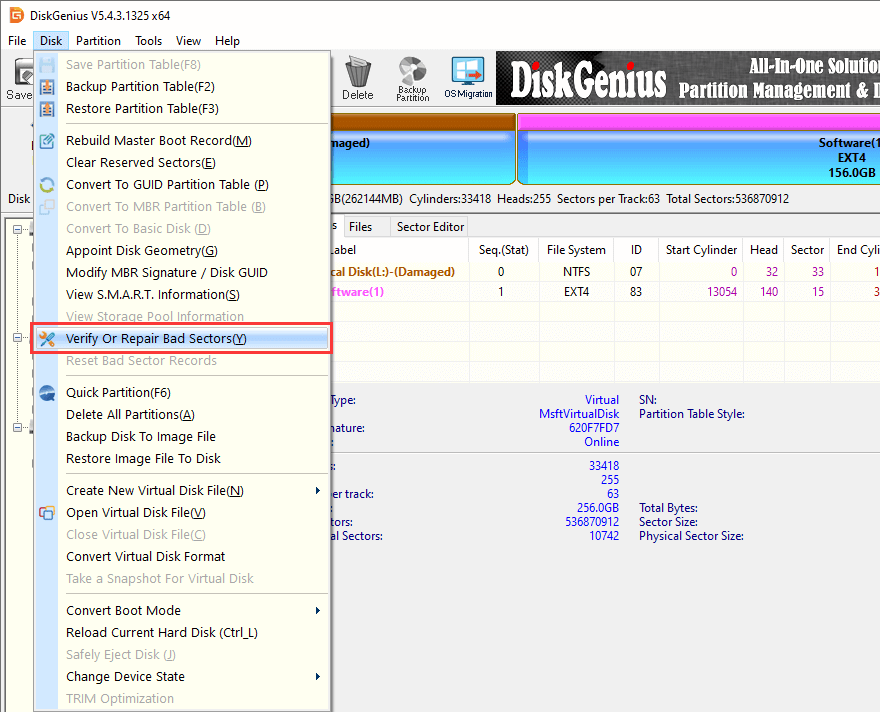
Step 2. Click "Start Verify" button and DiskGenius starts scan the SSD and check if there is any bad sector.
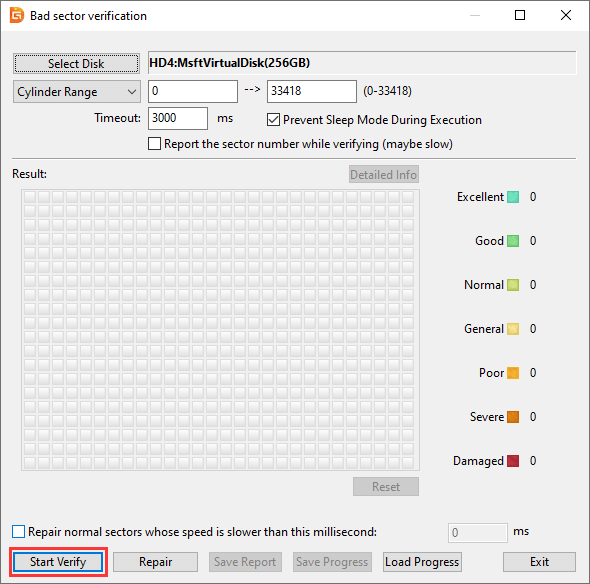
Disk conditions are presented by blocks in different colors, for example, red block with "Damaged" means bad sectors, and "Severe" blocks are likely to turn to bad sectors.
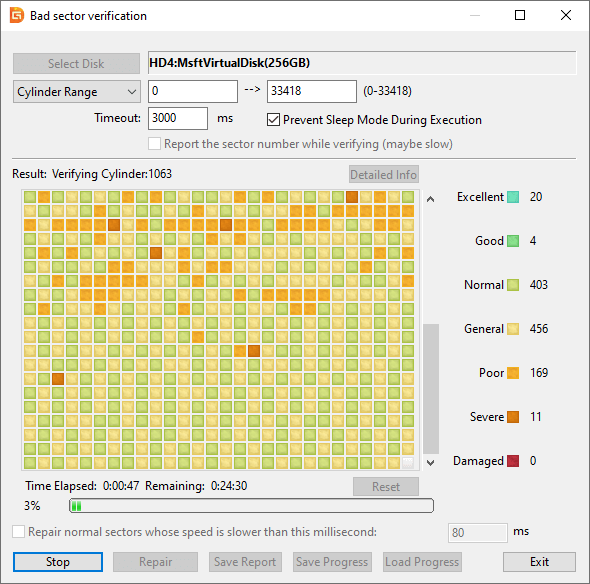
Step 3. Click OK button when scanning finishes.
Note: Checking for bad sectors is a read-only operation, but repairing bad sectors will destroy data on or near the bad sectors. Please back up or restore your data before attempting to repair bad sectors.
Step 4. Click "Repair" button when DiskGenius finishes bad sector scanning. Then click "OK" button if you've backed up all data on the SSD.
Step 5. Click the "OK" button if there is no need to recover data from the SSD. Then DiskGenius starts to repair bad sectors.
1. Keep at least 10-15% free space to improve performance and lifespan.
2. Back up important data regularly.
3. Enable TRIM function (usually enabled by default in modern operating systems).
4. Avoid extreme temperature environments.
5. Check for firmware updates regularly.
You should consider replacing your SSD when:
1. The health status shows "Warning" or "Failure".
2. Frequent read and write errors.
3. System boot or file access becomes noticeably slower.
4. Unexplained file corruption occurs.
By regularly checking SSD errors, you can detect problems in advance and take appropriate measures to ensure data security and stable system operation.
Regularly checking your SSD for errors is an important step to maintaining the health of your computer and keeping your data safe. By using built-in tools or third-party applications, you can get a comprehensive overview of the health status of your SSD and take appropriate action. Remember, prevention is always better than repair, and regular monitoring can help you detect problems before they become serious.
By following the advice in this guide, you can maximize the lifespan of your SSD, keep your data safe, and enjoy the fast performance that your SSD brings.

DiskGenius is a one-stop solution to recover lost data, manage partitions, and back up data in Windows.
Download Facebook
 YouTube
 X
X