
Updated on Jul. 02, 2025
Position: Resource - Partition Management - How to Format a Memory Stick to FAT32?
• Compatibility: FAT32 is one of the most widely supported file systems across various devices. It works well with Windows, Mac, Linux, as well as many consumer electronics like smart TVs, game consoles, and digital cameras. If you plan to use your memory stick on multiple types of devices, formatting it to FAT32 can ensure seamless compatibility.
• Simplicity: The FAT32 file system has a relatively simple structure, making it easy for operating systems to read and write data. This simplicity can also result in faster access times for small files, which is beneficial for certain applications.
• Initial Setup or Problem Resolution: If you've just purchased a new memory stick or if you're experiencing issues with the current file system (such as data corruption or slow performance), formatting it to FAT32 can be a good way to start fresh and potentially resolve those problems.
1. Insert your memory stick into a USB port
2. Open File Explorer (Windows key + E).
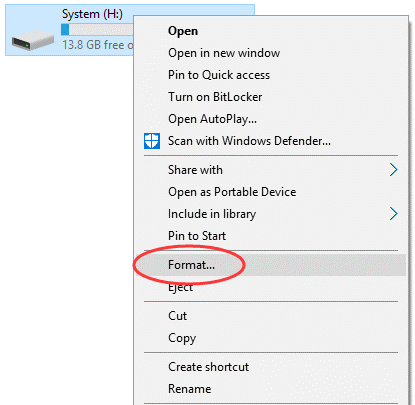
3. Right-click on your USB drive and select "Format".
4. In the File System dropdown, choose "FAT32".
5. Check "Quick Format" for faster formatting (uncheck for thorough formatting).
6. Click "Start" then "OK" to confirm.
1. Right-click the Start button and select "Disk Management".
2. Locate your memory stick in the list.
3. Right-click on its partition and select "Format".
4. Choose FAT32 as the file system.
5. Proceed with the formatting.

For memory sticks larger than 32GB, Windows may not show FAT32 as an option in the standard tools. In this case, you can use DiskGenius. DiskGenius supports to format a partition to NTFS, FAT32, FAT16, exFAT, EXT2, EXT3, and EXT4 file system. The operation is very simple and easy.
1. Run the latest version of DiskGenius, select the connected memory stick in the software, and then click the "Format" button on the toolbar.
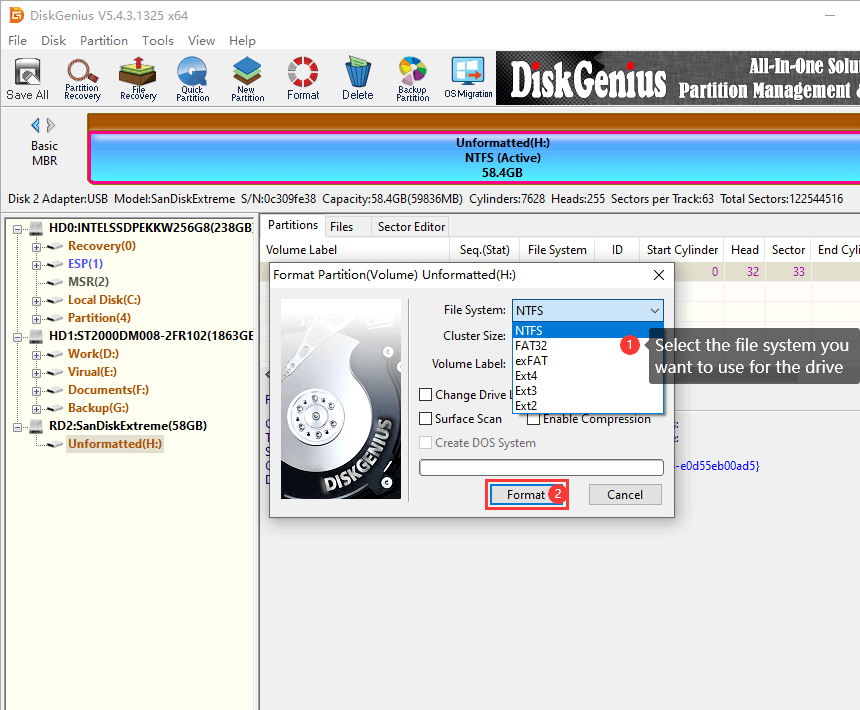
2. Set the file system to FAT32 and click "Format".
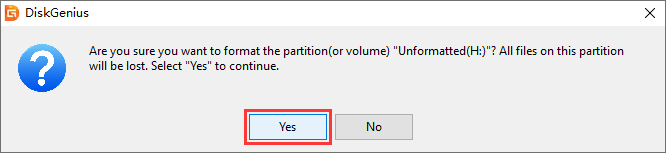
3. Click "Yes" when DiskGenius asks confirmation for the operation, and the memory stick will be formatted quickly.
1. Connect your memory stick.
2. Open "Disk Utility" (Applications > Utilities).
3. Select your USB drive in the left sidebar.
4. Click "Erase" at the top.
5. Choose "MS-DOS (FAT)" from the format options (this is FAT32 on Mac).
6. Click "Erase" to begin formatting.

1. Insert your USB drive.
2. Open a terminal.
3. Identify your drive with: lsblk or sudo fdisk -l.
4. Unmount the drive (if mounted): sudo umount /dev/sdX1 (replace X with your drive letter).
5. Format with: sudo mkfs.vfat -F 32 /dev/sdX1.
• Backup Your Data: Formatting a memory stick will erase all the data on it. Before proceeding, make sure to back up any important files to another storage device, such as an external hard drive or cloud storage.
• Check Compatibility: While FAT32 is highly compatible, it has a limitation of not being able to store individual files larger than 4GB. If you plan to store large files, you may need to consider other file systems like exFAT.
• Drive Integrity: If your memory stick has physical damage or bad sectors, formatting may not fully resolve all issues. In some cases, it may be a sign that the drive is failing, and you should consider replacing it.
Formatting a USB drive to FAT32 is a straightforward process regardless of your operating system. While FAT32 has some limitations, its universal compatibility makes it an excellent choice for flash drives used across multiple devices. Always ensure you've backed up important files before formatting, and choose the method that works best for your specific needs and operating system.
DiskGenius is a one-stop solution to recover lost data, manage partitions, and back up data in Windows.
Download Facebook
 YouTube
 X
X