
Updated on May. 07, 2025
Position: Resource - Disk Utilities - How To Share a Drive Over LAN or WAN with DiskGenius?
In scenarios such as multi-device collaborative work, remote technical support, and home data sharing, users often wish to access disk data from another computer remotely. To meet this need, DiskGenius added the share disk feature starting from version V6.0. This feature allows users to share a hard drive or other disks from one computer to another over LAN (local area network) or WAN (wide area network), enabling cross-network access, data transfer, and maintenance operations. This article will give a detailed illustration of this new feature and show you how to share a drive over a LAN and WAN.
The Share Disks feature in DiskGenius can share a local disk with other devices in either read-only or read/write mode. No complex setup is required on the accessing side shared disks can be easily mounted and browsed as if they were local. The feature supports two types of connections:
LAN (Local Area Network) connection: This connection method is very suitable when the sharing end and the access end are in the same LAN environment, such as a home Wi-Fi network or an enterprise intranet.
WAN (Wide Area Network) connection: If the two devices are in different network environments, such as when you need to access the company computer disk when working in a different location, or when a remote technician is maintaining a faulty computer, the WAN connection method can play a role.
This function does not require users to set up additional FTP or Samba services. Relying on the built-in P2P data transmission mechanism of DiskGenius, convenient and secure disk sharing can be achieved.
To help better understand the operation process of sharing a drive, this article defines the two computers involved in the sharing operation as follows:
The Sharing End: The computer provides the disk resource, and installs the hard drive or storage device that will be shared with other devices.
The Accessing End: The computer that needs to access the shared disk. It’ll load the shared disk and access data on it.
When both devices are within the same local network, it is recommended to use the LAN connection method, which is simple to configure and offers stable connectivity. The specific steps are as follows:
Step 1. Operation on the Sharing End:
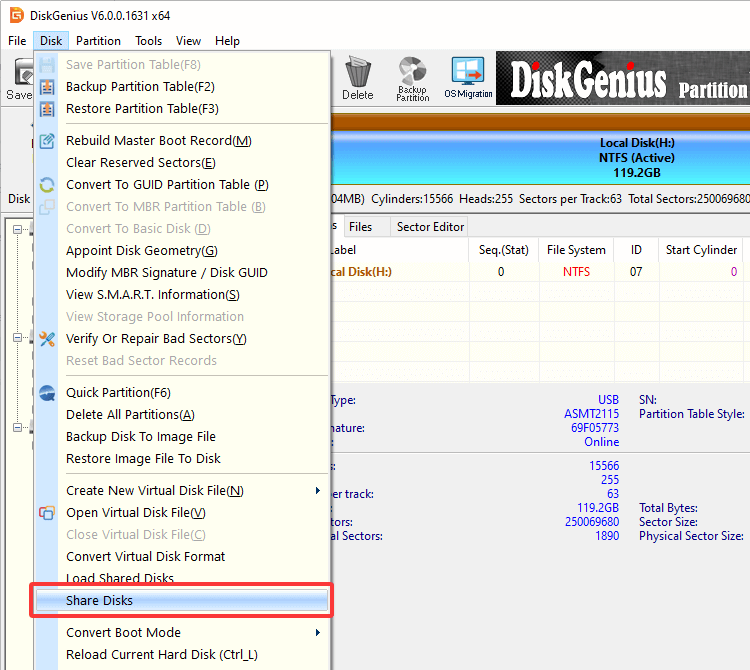
1. Launch DiskGenius, click the disk you want to share in the disk list on the left oane → click the "Disk" menu → select "Share Disks".
2. In the pop-up window, select "LAN (Local Area Network) Connection" and click "OK".
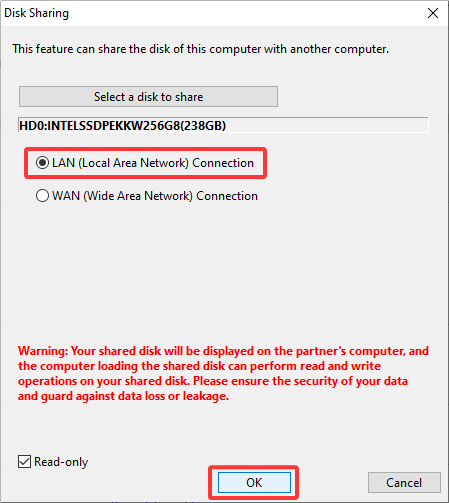
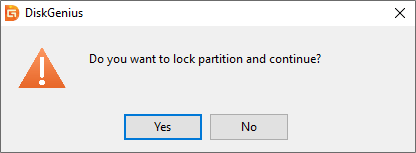
If prompted "Do you want to lock partition and continue?", click "Yes".
Step 2. Operation on the Accessing End:
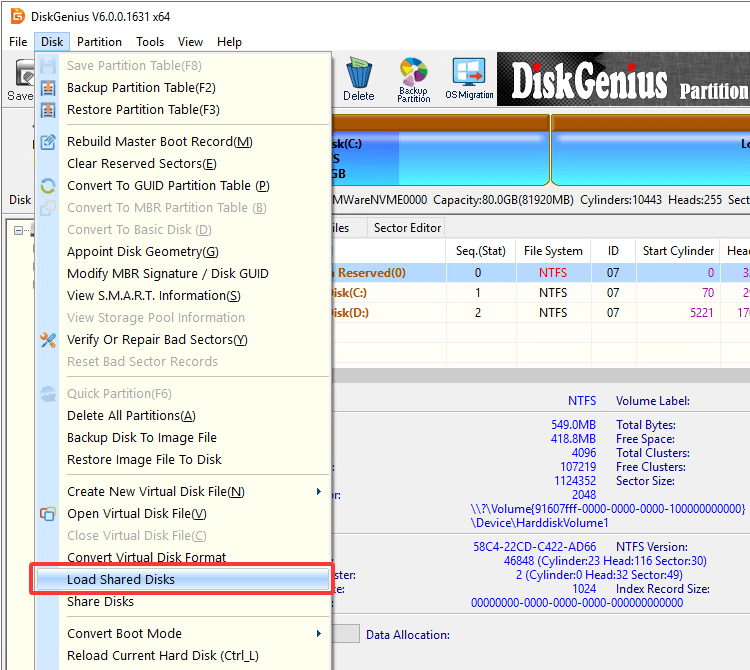
1. Launch DiskGenius and go to the "Disk" menu → select "Load Shared Disks".
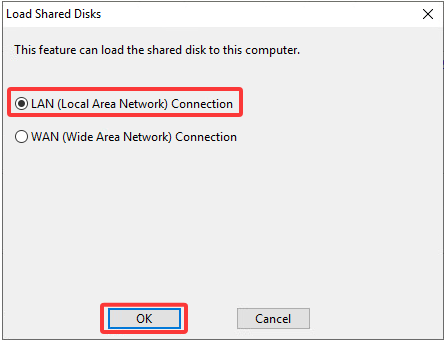
2. In the pop-up window, select "LAN (Local Area Network) Connection" and click "OK".
Step 3. Confirm the disk sharing:
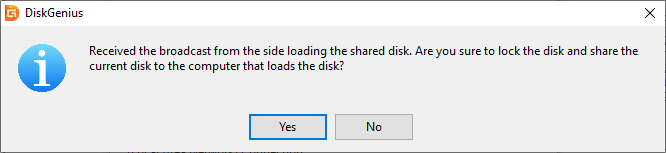
The sharing end will receive a broadcast request: "Received the broadcast from the side loading the shared disk. Are you sure to lock the disk and share the current disk to the computer that loads the disk?" Click "Yes".
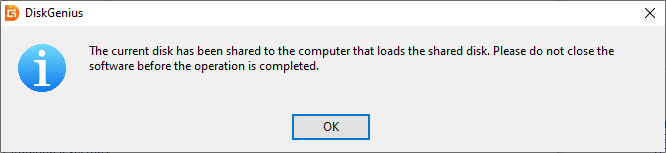
The software will then display a prompt: "The current disk has been shared to the computer that loads the shared disk. Please do not close the software before the operation is completed." Click "OK".
After a short wait, the Accessing End will be able to see the shared disk in the DiskGenius interface and access files on it.
When the two devices are not in the same LAN, for example, if remote access is required, you can choose the WAN connection method. Follow the steps below:
Step 1. Operation on the Accessing End:
1. Open DiskGenius, go to "Disk" → "Load Shared Disks".
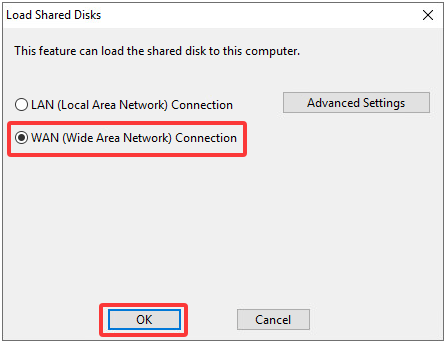
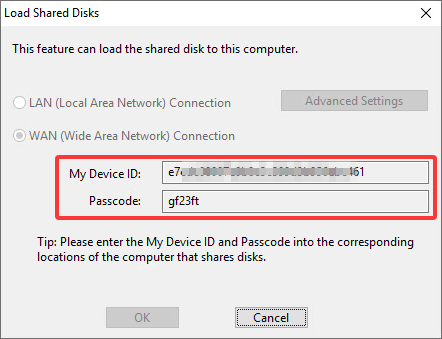
2. In the pop-up window, select "WAN (Wide Area Network) Connection" and click "OK".
Tip: If the network environment is complex, you can click the "Advanced Settings" button before confirming to change the port number or select IPv4/IPv6 as needed to adapt to various network conditions.
This dialog will display the "My Device ID" and "Passcode", which will be used by the Sharing End in the next step.
Step 2. Operation on the Sharing End:
1. In the DiskGenius disk list on the left pane, select the disk you want to share. Click "Disk" → "Share Disks".
2. Select "WAN (Wide Area Network) Connection" and enter the device ID and passcode provided by the Accessing End. Click "OK".
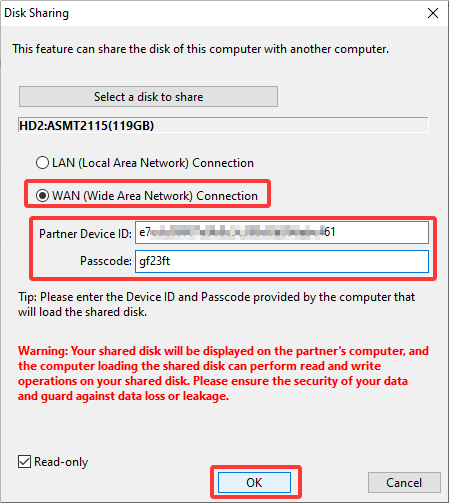
When prompted "Do you want to lock partition and continue?", click "Yes" to complete the sharing operation.
If prompted: "The current disk has been shared to the computer that loads the shared disk. Please do not close the software before the operation is completed." Click "OK".
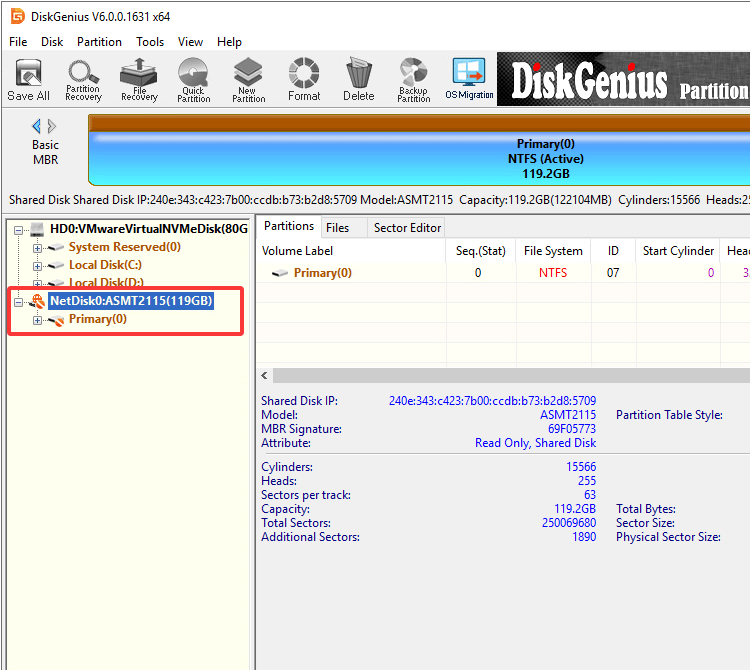
After completing the above steps, the Accessing End will be able to see the shared disk in the DiskGenius interface.
Notes:
When using the Share Disks function, both the sharing end and the accessing end must maintain a stable network connection to ensure the stability of data transmission.
In order to prevent firewalls from blocking DiskGenius port communication, it is recommended to add firewall exception rules to ensure that the software can perform data transmission normally.
DiskGenius is a one-stop solution to recover lost data, manage partitions, and back up data in Windows.
Download Facebook
 YouTube
 X
X